Seth's House
100% Whole Wheat Quick Ciabatta Recipe
Ciabatta bread is one of my favorite breads to make sandwiches with, or just toast up and top for breakfast. Finding a whole wheat one (aka ciabatta integrale), however, is near impossible, so, I make my own. I have a goal to scratch make as much food as I possibly can, and only buy ingredients instead of the finished product, so I’ve been developing many bread recipes lately and this is the second one that I’ll be sharing.
The recipe that I based mine off of is not 100% Whole Wheat.. so I’ve adapted it to make it 100% by adding Vital Wheat Gluten and Diastatic Malt Powder. The rest of the recipe and process is about the same.
If you don’t have a kitchen scale, get one. Measuring by weight will give you consistent results with making bread, versus measuring by volume.
This is a very wet dough .. don’t be alarmed 🙂
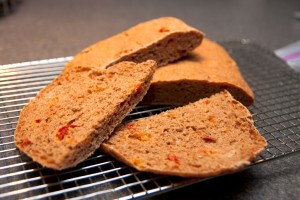
Looking to make a more interesting loaf? Throw in some ingredients during the mixing stage!! In these pictures, you’ll see my version of the bread which includes Sundried tomato, garlic, and basil.
Ingredients
- 500g Whole Wheat flour
- 475g Warm Water (~2 cups)
- 1/2 teaspoon Diastatic Malt Powder
- 1 tablespoon Vital Wheat Gluten
- 2 teaspoons yeast
- 15g salt
- Place all ingredients into your stand mixer, and mix all ingredients with the paddle until combined. Let rest 10 minutes
- Leaving the paddle in, start working the dough on the lowest speed setting for about 10-30 minutes. You are looking for the dough to separate from the sides of the bowl, and start to climb up the paddle – if it climbs too soon, switch to the dough hook.
- Pour into a well oiled container and let it triple – this should take about 2-3 hours
- Dump the dough (use a spatula if you have to) on to an extremely well floured surface, and cut it into half. Stretch both halfs out to oblong rectangle shapes, and place on to well oiled pieces of parchment paper. Cover them with well oiled plastic wrap, and let rise in a warm place for 45 minutes. If you are baking on baking sheets, put the dough and parchment paper on them now. After you have tried this recipe once, you will see how the dough behaves and will be able to safely transfer on to a well floured peel and bake on a stone.
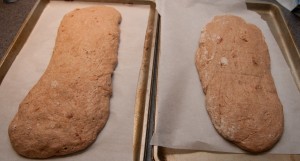
- Have your oven to 500F by the end of the 45 minutes, and also have a few cups of boiling water ready at the 45 minute mark. Also, place a crappy cooking sheet or baking pan on the bottom shelf.
- Flipping the dough before baking is in the original recipe, but I’ve skipped it without noticing any difference. The dough will be easily flattened, so be careful with it. It does have quite an oven spring, but not enough to undo any damage you’ve done. If you take the flipping route, I suggest placing a second piece of parchment paper on top of the dough, and then flipping the whole shebang upside down to transfer – don’t pinch it with your fingers. Remember, this dough is very sticky.
- Place the dough in to the oven, either on pans or transfer on to a stone. Before closing the door, pour a cup of your boiling water in to your crappy pan on the bottom shelf, or directly on the oven floor, and quickly close the door. Every 3 minutes for the first 9 minutes, open the door and quickly spritz the walls with a squirt bottle of water, or pour more water on your pan. This steam is what creates a nice crust on the bread.
- Bake for 15-20 minutes or until you have a nice brown bread and internal temperature registers 205F.
What do I do with all of…. these sun dried tomatoes?
I buy and cook in bulk, so often, I am left with ridiculous quantities of ingredients. This is the first of many posts in which I figure out what to do with some of this stuff.
First on my list, Sun Dried Tomatoes. Lee and I split a 5 pound bag of these for about 13 bucks at the restaurant supply. (edit: you can find them cheaper at one of my favorite spots, the Asian Market – H-mart on 70)
Because of some work on other recipes I also had too much Basil and Italian Parsley, which go great with the tomatoes. I don’t know what to call this, but it’s good. Into the food processor goes
- Sun Dried tomatoes (about a handful)
- Garlic (heaping spoon of minced…. never enough garlic in my house, but don’t let it overpower the herbs)
- Basil (fresh of course)
- Italian Parsley (…. yep still using fresh stuff)
- Parmesan (just a dusting)
- Olive oil (depends on the consistency you want)
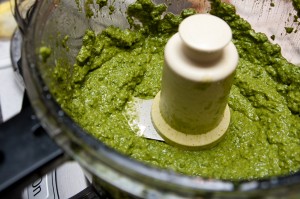
Pulse it a bunch of times… now you have a nice, fresh tasting, chunky spread. Use it on some toasted up crunchy bread, crackers, or hell, even on top of pasta. I suppose you could leave the processor going and make some puree. I took out some of my trusty low-calorie cocopop things and spread it on there for a fugazi bruschetta.
The credit for the next thing to do with these things goes to Lee. Put the tomatoes in a pint mason jar, along with some italian seasoning and garlic, and top off with olive oil. Put it in the cabinet and forget about it for a few weeks. Come back, and you have some tasty tomatoes, as well as sundried tomato infused olive oil that is great for cooking. Slice up the tomatoes and cover pasta, or even use these in some……. wait, nevermind, that’s for another blog post 🙂
Processing, Take 1: Pesto
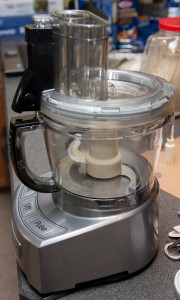
Thanks to a Kohl’s 30% off coupon, and a big sale, I picked myself up a nice Cuisinart Food Processor. I was going to pick up a stand mixer but I first consulted Lee and we figured it would be better to loan each other big ticket kitchen items like this, instead of buying each for ourselves. Makes sense to me.
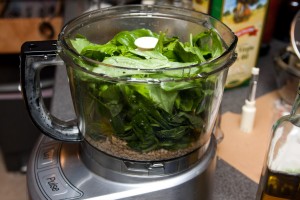
I had an extra ridiculous amount of Basil due to a restaurant supply addiction, and an itch to use the food processor, so it is Pesto time. Pesto is a simple, fresh tasting spread or sauce, and has countless uses. It’s SO easy to make and have ready fresh for a meal.
Ingredients
- 4 cups fresh basil leaves, packed
- 1 cup grated parmesan (romano will do)
- 1 cup extra virgin olive oil
- 2/3rds cup pine nuts (apparently you can substitute walnuts, I will next time – pine nuts are EXPENSIVE!)
- 6 cloves minced garlic
Preparation
- If your pine nuts and garlic are not chopped, toss them in the food processor and give it a few pulses to chop them
- Add the basil and garlic, and turn the processor on. Slowly add the olive oil through the feed tube until it is all in there, stopping when necessary to scrape the sides of the processor. You want to make a puree so keep going until you get there.
- When it’s done, add the cheese and pulse a few times
Makes: 2 cups, eh, maybe a little more than that. Nothing is exact with my cooking, you should know that by now.
Storage
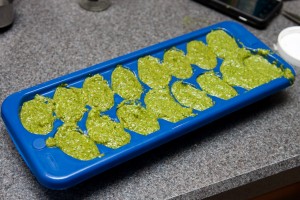
Air is the enemy of Pesto. Leave it out and watch it turn funny colors in a few minutes. If you are going to freeze it, some say to leave out the cheese, but I didn’t do that and it’s fine. What I did do though, was pipe it into ice cube trays and covered closely with plastic wrap. When frozen, I transferred to my trusty vacuum sealed bags and they will be in the freezer until called upon.
Now that you have all this Pesto, what are you going to use it for? I highly recommend using it minutes before you are ready to eat it, here are some thoughts that come to my mind
- Pesto spread on some nice crusty Italian bread
- Pesto on some DIY pizza
- Pesto on pasta… that’s an easy one
- Marinade for Chicken
- the list goes on…
San Marzano Sauce – Take 2
A little update to my original post, because, well, I forgot to write some important steps and I also picked up a new kitchen gadget (thanks, Bed Bath 20% coupons!).
Before adding all of the tomatoes, you’ll want to deglaze all the garlic and onion goodness on the bottom of the pot with some red wine – probably about a cup.
The only difference as far as method / technique this time around is my spiffy new food mill. Instead of screwing around with picking out the stems and seeds, this neat thing does it for you ! $40 at Bed Bath after using one of their 10 bazillion 20% coupons I get in the mail. It made for a smoother sauce with less chunks, I like it.
Eating good does not have to suck
I’m on a diet. Diets suck, especially for fat dudes like myself that like to cook, and eat. I’m counting calories, so the frozen dinners at the grocery store are quick and easy for me and usually come in around 2 bucks. It’s not gourmet, but some of the stuff is bearable with a little Tabasco (which I happen to have a bunch of).
Diet’s don’t have to suck entirely, though.
- Your tastebuds don’t have to suffer
- Your wallet doesn’t have to suffer
- Your diet doesn’t have to suffer
If you are a foodie and on a diet, it’s win win, you just need to make a major adjustment to portion size like I have.
Anyways, on to the topic. The above pic shows the fruits of about 90 minutes of work, all with stuff in my fridge or in my cabinets. If you want to rob a chinese restaurant for containers, go ahead, but I hit the restaurant supply for a case of microwaveable containers at around 19 cents a pop. I’m not going to give specific recipes in the post, my point is more to motivate you to think and plan, and say to hell with the frozen dinners at the grocery store – make your own – your wallet and your mouth will thank you.
By the way, all come in at less than $1 per meal, and less than 300 calories. 19 meals. word.
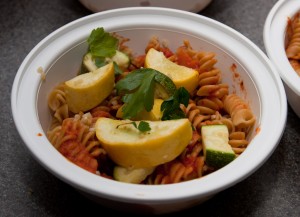
I cooked up 2 pounds of Pasta that made 15 portions. While I had the oven going for the chicken thighs below, I threw in some sliced up squashes, garlic, and a little olive oil into a foil pouch and put into the oven for 30 minutes. Topped with homemade San Marzano tomato sauce.
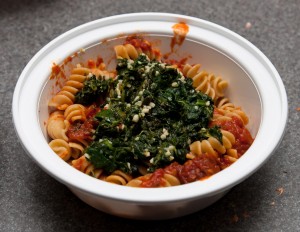
With the rest of the pasta, I also hit it with the San Marzano sauce. For veggies, I found some chopped spinach in the freezer, sauteed that quick with some garlic and voila. Don’t mind the presentation, this crap is goin in the freezer and I’ll stir it when I reheat it anyway.
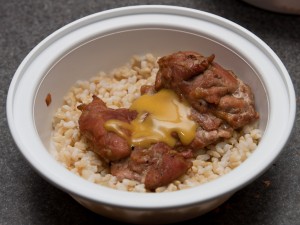
I had some Mahogany Chicken in the fridge, cooked that up, served over Basmati rice, and put a little bit of no-fat honey mustard dressing on top.
I have to get rid of some tortillas and onions I had laying around, so I sauteed up the onions and some of my canned jalapeno slices in some Fajita seasoning. I’ll be using them as filling for quesadillas.
Ok, now get off your butt, and go cook.
San Marzano Tomato Gravy
San Marzano tomatoes are sweet and low on seeds, making them perfect for sauce. If you want to read more about San Marzano tomatoes and why they are the bomb, Google is your friend 🙂
Lee and I took a trip to the restaurant supply and they had 5lb 10oz can’s of these babies for about 6 bucks. The recipe below is nothing revolutionary in the gravy world, it’s about the same way that everyone I know makes it. The only thing different for me this time around was the use of San Marzanos, and pepperoni. The pepperoni idea came from a friend of mine, his wife makes it that way. Normally I’d make some meatballs with Roz’s (Big Joe’s Mom) recipe and toss them in the gravy for some meaty goodness to deliver flavor, but I thought I’d give this a shot.
Disclaimer: this is the first of many recipes I will be posting .. for the most part I don’t usually measure things, I cook by taste and eyeball most things. Learn to do the same and you’ll have a lot more fun cooking.
Ingredients
- 5 lb 10 oz can of San Marzano tomatoes. Dump them into a bowl first, you’ll want to pick out the stems (whatever you call it) and pick off the skin if it allows
- Basil, Oregano, Italian parsely – fresh if you got it, dried will do
- Pepperoni, chopped into chunks (see the pic) – about 2 cups or so
- 6oz can of tomato paste
- Onion, two or 3 small yellow or sweet ones, diced up
- Garlic, dice up some fresh or use a few heaping spoonfuls of the minced stuff out of the jar. In my house, there is no such thing as too much garlic
Recipe:
- Hit the bottom of your pot with a coating of olive oil, and turn the heat to medium high. Toss in the onions and garlic and let them sweat
- Once it smells delicious in your kitchen, and the onions are about clear and garlic is starting to brown, throw in a couple tablespoons of your herbs, about a handful of fresh stuff or a few tablespoons of the dried stuff. Stir it up.
- Add the tomatoes and tomato paste, give it a good stir. Leave the heat around medium to avoid a tomato volcano
- Heat up a frying pan to medium-high and toss in the pepperoni. Brown them up then toss them in the sauce. I’m on a diet, so I picked them out of the pan this time, but Fat Seth would have thrown in the pepperoni and all the oily goodness that fried out of it
- Bring the mixture to a boil, then reduce heat to low and cover. Stir every 10 minutes or so. Cooking time is personal preference and by taste, but any where over an hour will do the trick, no harm in 2.
- At the end, throw in more fresh herbs. The reason I put them in the beginning AND the end is that cooking them will change the flavor, I want the flavors of both the cooked and the freshness of tossing them in at the end
That’s all. When I did this, I came up with about 6 pints of sauce and I canned it in the trusty pressure canner (60 mins @ 15psi). If you don’t can, then eat up the sauce fresh, or save it in the fridge/freezer.
Enjoy
