Seth's House
Ugly Drum Smoker (UDS) Build
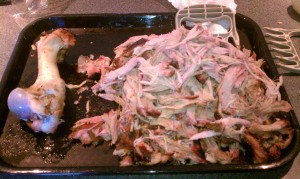
First pork butts out of the UDS
While my CharGriller Smokin’ Pro has done me right over the years, I wanted to build another smoker with more capacity. Originally, I was going to build an offset smoker with a 55 gallon drum. Once I started researching that, I came across plans for an Ugly Drum Smoker, and after a ton of reading, decided to go that route.
My plans were based off all of the reading in the BBQ-Brethern.com thread, as well as the plans from this site. All the credit goes to them.. I didn’t invent anything, I just did a lot of reading and followed recommendations.
Upon setting out, I knew I wanted two things out of this.
- Two cooking grates (twice the cooking area 🙂 ). That means I had to use a dome lid
- PID control -done, see here
For #1, many folks take the lid off of a Weber 22.5″ grill, which fits directly on a 55 gallon drum without any modification. I wasn’t about to drop a bunch of coin just to get a lid, and I don’t need another grill, so I found an alternative. This Uniflame 22.5″ Grill from Walmart has a lid that will fit a 55 gallon drum with a tiny modification – see Thread 1 or Thread 2. Bonus – the grill was on clearance at Walmart, I picked a few of them up for $20 a piece.
The Build
I have friends in the auto industry, and they in turn have access to 55 gallon drums. My cost on the drum was 0, but you can find them in the Philly area quite easily for about $25 if you look on Craigslist.
I also have friends with a Powdercoating business, so I was able to get a quality powdercoating job on the entire outside of the drum done in a nice, bright blue, without breaking the bank. I could have painted the drum like most people, but the powdercoating came out AWESOME and it will last for years to come.
Check out Precision Powdercoating, that’s where I had the drum done. Tell them I sent you!
Anyways ..
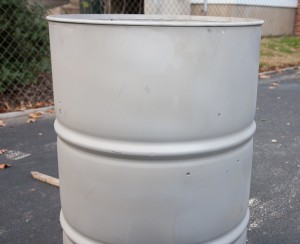
First I had the drum completely sandblasted. This is also a requirement before powdercoating, so I probably did not need to get this done twice. In the following pictures, the gray color is the bare metal of the drum after sandblasting.
First step before painting or powdercoating is to make all of the necessary holes and modifications to the drum.
Marking the 3 air inlet holes
I tied a string around the drum, took it off, marked it off in thirds, transferred the marks to the drum and drilled.
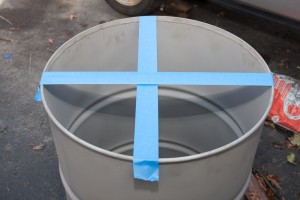
I used tape to mark center lines across the top of the drum.
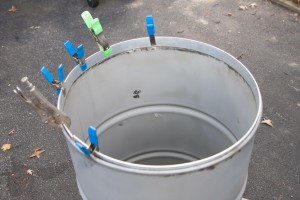
Once I had even marks around, I made my holes for mounting the grate holder bolts, thermometer, handles, and thermocouple.
Mounting holes for various items
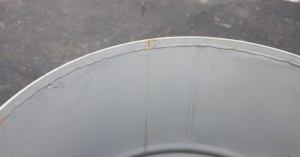
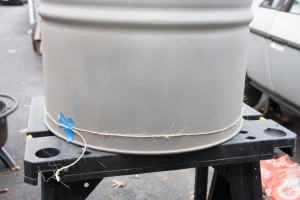
The inside rim of the drum was rough, from removal of the original top (the drum was sealed)

Took the angle grinder to smooth out the inside lip
To make the Uniflame lid fit snugly, I took some 1/8″ thick 1 1/2″ aluminum flat bar, bent it around the inside of the lip, then riveted it into place.
Start at one end, place rivets about every 6 inches. Trim the flat bar once you are at the very end (and don’t cut it too short like I did, otherwise you have to fill a gap)
Dome fits snug now!
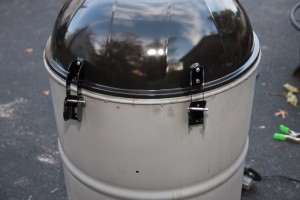
I used the hinge hardware that came with the Uniflame grill, and attached it to the UDS.
The only modifications to the hinges that were necessary was to make new holes for the pins to go through .. easy work with a drill.
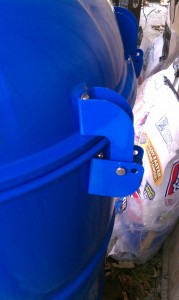
Modified hinge mechanism
Once all of the holes were done, I disassembled everything and sent the drum out for powdercoat (outside of the drum only!). Once it came back, I mounted all of the hardware up, using stainless hardware. To seal the drum well, you should use high temp RTV around each and every fastener from the inside of the drum (yes, it is food safe). I didn’t do this step, and I had a ton of oil leak out of each and every fastener hole, staining my fresh powdercoat job 🙁 Seal the aluminum lip for the lid, from the bottom of the lip inside the drum, to keep air from leaking out. I used a flashlight place inside the drum, facing up at my face, to see the air gaps and make sure I sealed it properly.
For the charcoal basket, I used the charcoal grate from the Uniflame grill, and expanded steel. I bent the expanded steel around a propane tank to get the basic shape, then welded it to the grate and itself, forming a cylinder. I then took a cheap $5 aluminum pizza pan from Walmart to use as an ash pan, using stainless 3″ bolts to offset it from the rest of the basket.
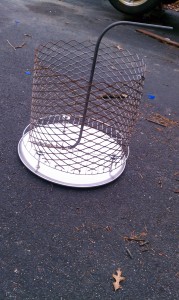
Here’s the charcoal basket. I scrapped the original handle idea and just put a bar across the top.
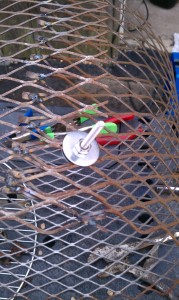
Used nuts and bolts to hold the steel together while I welded it. (p.s. my welding skills suck, I know!)
That’s about it! Along with my 12v PID controller, the UDS has proven to be quite awesome!
More pics:
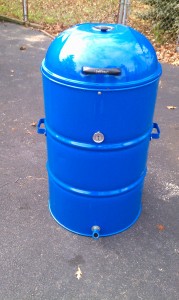
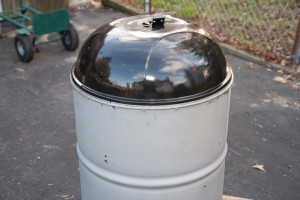
Assembly complete, ready to go
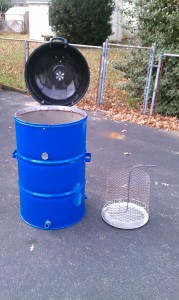
UDS and basket

Seal your holes well.. or you get THIS!
